Photo files can quickly take up a lot of space on your computer, leading to slower performance and less storage room. If you’re like many people, you may have hundreds or even thousands of photos on your PC. And if some or all of those photos are duplicates, that’s even more wasted space! This article will show you how to find duplicate photos in Windows 10 and Windows 11.
Part 1. 4 Free Ways to Find and Remove Duplicate Photos in Windows 10/11 (Manually and Automatically)
There are multiple ways to find and remove duplicate photos in Windows 10/11. However, some methods require manual effort, while some are automatic, offering a one-click process to do the entire process. Below are both methods to find and delete duplicate photos in Windows 10/11.
Way 1. Using File Folder (Manually)
One of the easiest and fastest ways to find images on windows is through the File Explorer known as Windows Explorer. However, there isn’t any official way or feature for windows explorer to remove duplicate images. That’s why it’s a manual method. However, here’s the workaround to find and delete the file using the file folder.
Follow these steps to find and delete the images using the file folder.
- 1.Launch the Windows Explorer by simultaneously pressing the Windows + E keys.
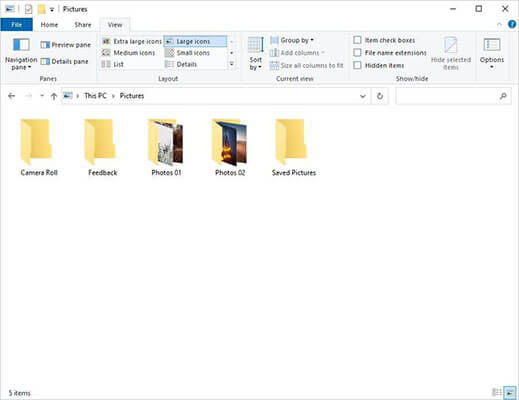
- 2.Navigate to the folder you wish to find and remove the duplicate photos.
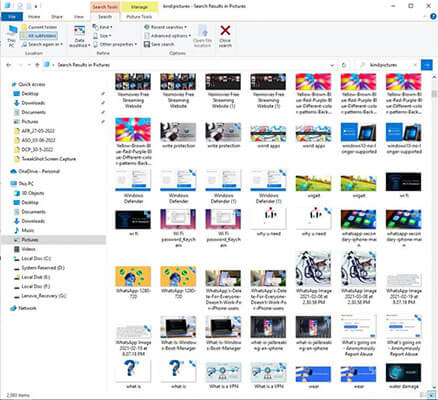
- 3.In the search box, type in Pictures to find the photos saved in the folder. A photo extension such as JPEG can make the search more precise and less time-consuming.

- 4.You’ll see all the photos saved in the folder. Change the viewing mode to make it easier to locate duplicate photos.
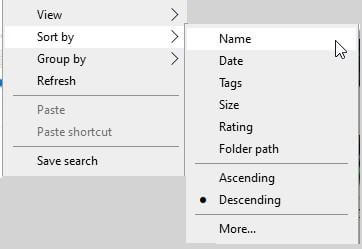
- 5.Use the filters to sort out the photos based on Name. To do so, right-click on the space, hover on the Sort by, and click Name to select it.
- Scroll through, locate the duplicate photos and select them to delete them. You can delete the duplicate photos by right-clicking on them and clicking on the delete in the list
Way 2. Using Windows Photos App (Manually)
Another great and simple way to delete duplicate photos is using the windows inbuilt photos app. It’s a manual method, so you would need to perform specific steps to identify and delete duplicate photos. However, it’s the fastest way to do so when your computer’s storage isn’t sufficient enough to install and run any 3rd party tool.
These are the steps to delete duplicate photos using the Windows Photos app.
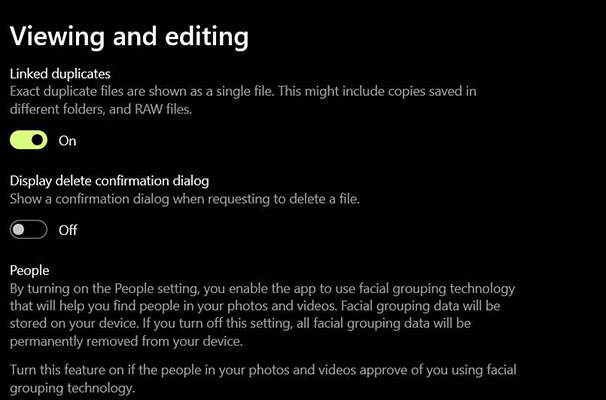
- 1.Open up the Windows Photos app and navigate to Settings. Under the Viewing and Editing section, turn off the toggle for Linked Duplicates. By doing so, the Windows Photos app won’t link the duplicates anymore. Now you should be able to find the duplicate photos using the Windows Photos app.
- 2.Go to the Photos app, and open the Photo Collection by clicking the Collection tab on the top.
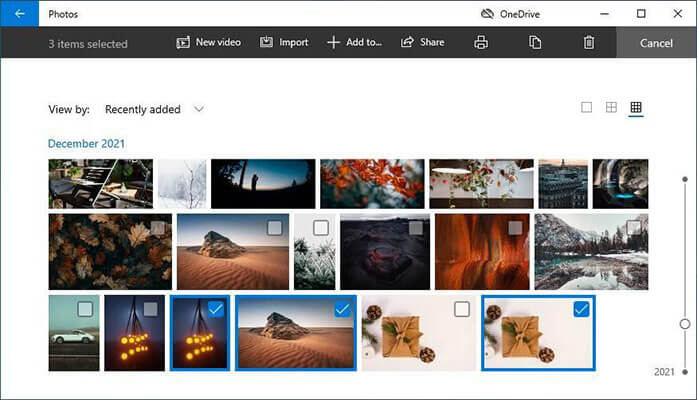
- 3.Windows Photos app will show up all the photos saved on the computer. Scroll through the photos collections, identify the duplicate photos, select them and click on the Trash icon to delete them.
Using the Windows Photos app might not be the most efficient method if you have too many duplicate photos. However, it gets the job done when you only need to delete them. Move to the automatic methods to identify and remove duplicate photos in windows 10.
Way 3. Using Command Prompt (Manually)
Using the cmd to find and delete duplicate photos in windows 10 is a bit more efficient than the methods mentioned above. Don’t worry if you aren’t a techie person. All you need to do is run some commands and let the tool do the desired job. Below are the steps to delete the duplicate photos using the Command Prompt.
- 1.To delete the duplicate images, navigate to the folder from which you want to delete the duplicate photos.

- 2.Next, copy the desired folder/directory path. To do so, right-click on the folder/directory and select Copy as Path.
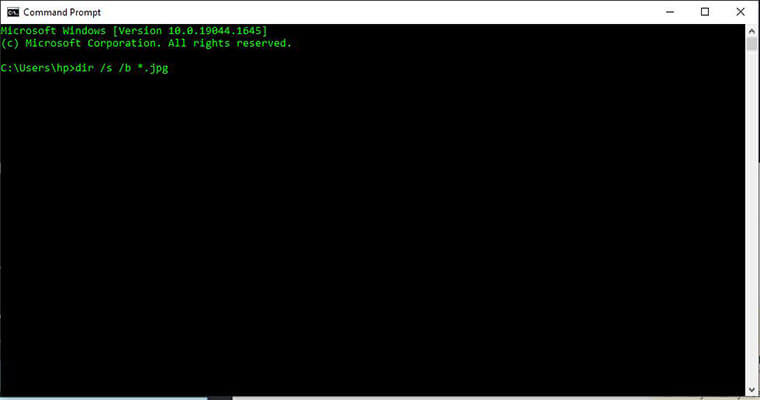
- 3.Open the cmd using the search bar in the Start menu and run the command del Path to file*.duplicate. Replace the “Path to file” with the copied path of the folder/directory.
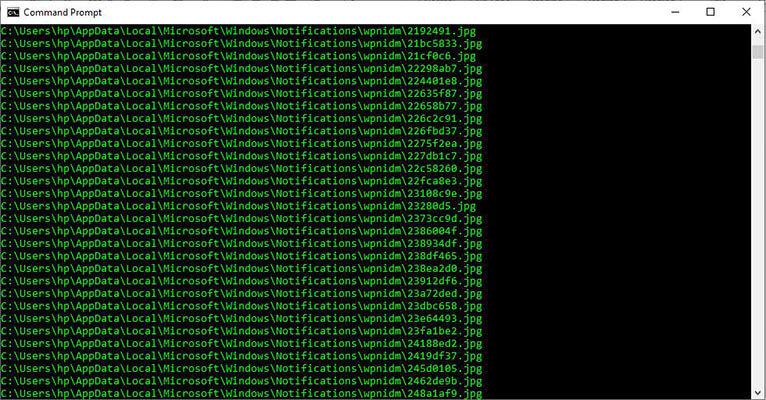
- 4.Hit the enter button to run the command, which will delete all the photos containing the duplicate in the name.
Way 4. Using Free Duplicate Photo Finder (Automatically)
If you have too many duplicate photos to delete, it’ll take plenty of time to find and remove them from the computer. However, there are automatic ways that help cut the effort required to find and delete duplicate photos from windows 10 manually.
Professional tools can automatically find and delete duplicate photos from windows. There are several tools available. However, some of the best ones are mentioned below.
- Duplicate Sweeper
- Duplicate Photos Fixer Pro.
- EaseUS Dupfiles Cleaner
The process of finding and deleting duplicate photos is complex. It takes time, but these tools make the task quick with automated features. If you want something more straightforward, though, EaseUS DUpfiles Cleaner may be best for your needs as it provides an easy way to search through all file types quickly without having any problems along the way – even ones that show up when cleaning out old devices like camera memories or hard drives from laptops.
Here are the steps about how to delete duplicate photos on Windows 10 using the EaseUs Dupfiles Cleaner.
- 1.Download the EaseUS Dupfiles Cleaner program on the computer and install it.
- 2.After launching the program, the main screen will show the automatically selected partitions to scan. You can edit it by clicking on “-”. Click on Scan to initiate it.
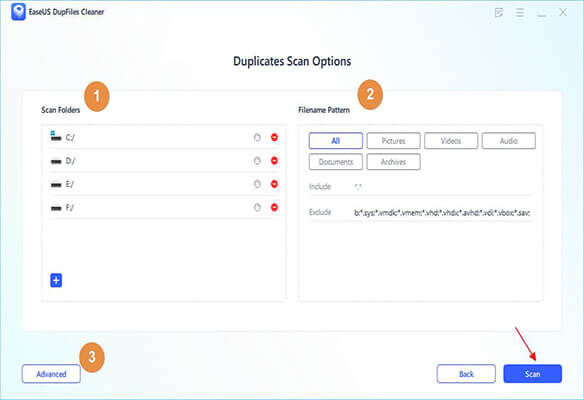
- 3.The program will start scanning the selected partitions. It’ll take time, depending on the number of files.
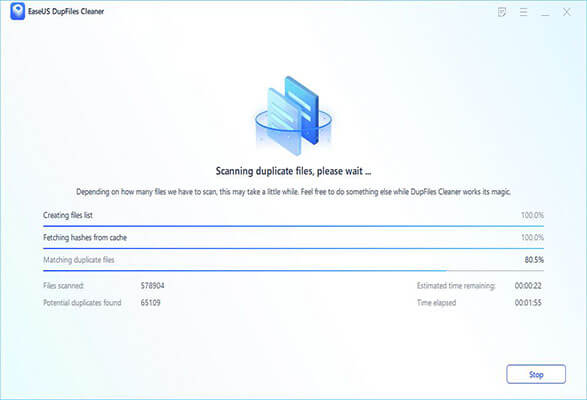
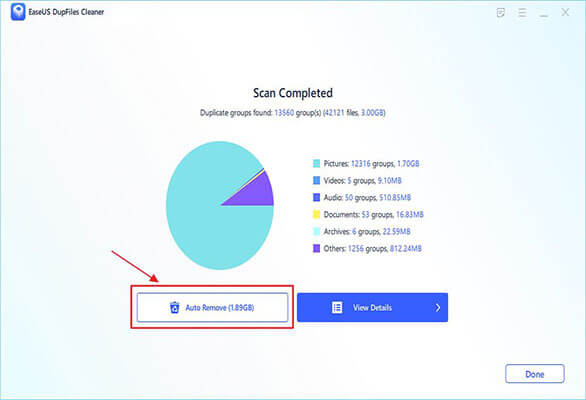
- 4.After the scanning process completes, you can click on the Auto Remove button to automatically delete the duplicate files, including the photos, from the computer; otherwise, you can click on the View Details to see the files found.
Part 2. How to Recover Deleted Photos on Windows?
Windows doesn’t offer any tool to recover deleted photos other than the recycle bin. If you accidentally deleted photos while removing the duplicate ones and cannot find in the Recycle Bin, you can recover them using the professional tool StarzSoft Data Recovery.
It lets you recover permanently deleted files even from the recycle bin. The intuitive user interface and one-click process make it a super easy and seamless task to recover deleted and lost files from Windows. Other than the windows files, you can also use it for external devices such as memory cards, smartphones and cameras.
These are the steps to recover the deleted photos on Windows using the Starzsoft Data Recovery tool.
Free DownloadSecure Download
- 1.Visit the official website to download the program and install it.
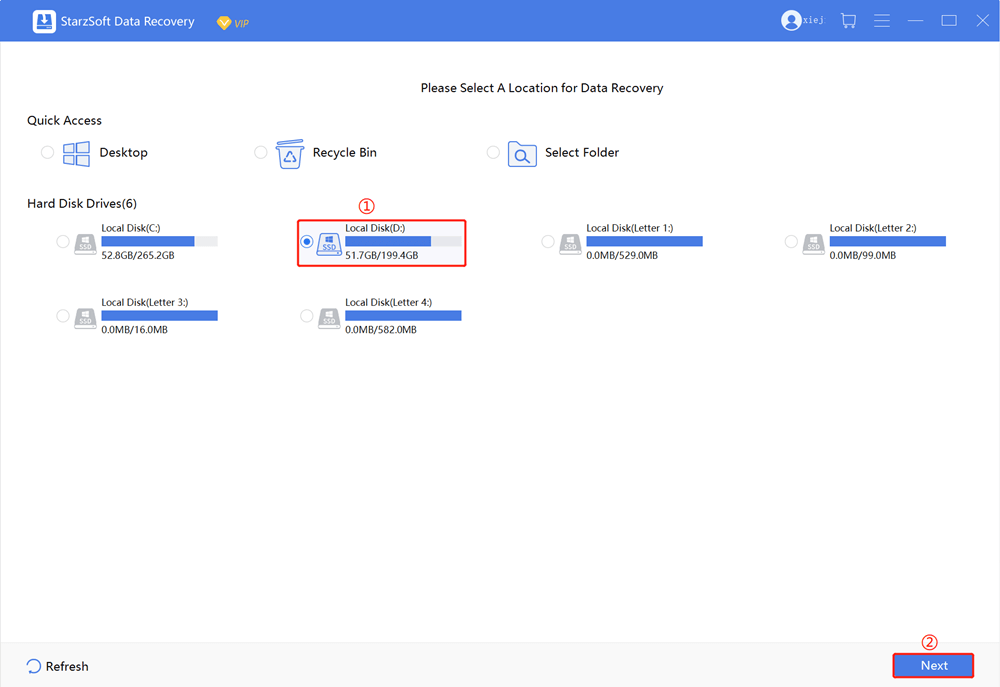
- 2.On the program’s main screen, select the drives you want to recover the photos from and click on Next. The program will begin scanning the directory.
- 3.Depending on the size, it might take a while to deep scan the select drive. However, you can pause and resume it at any time.
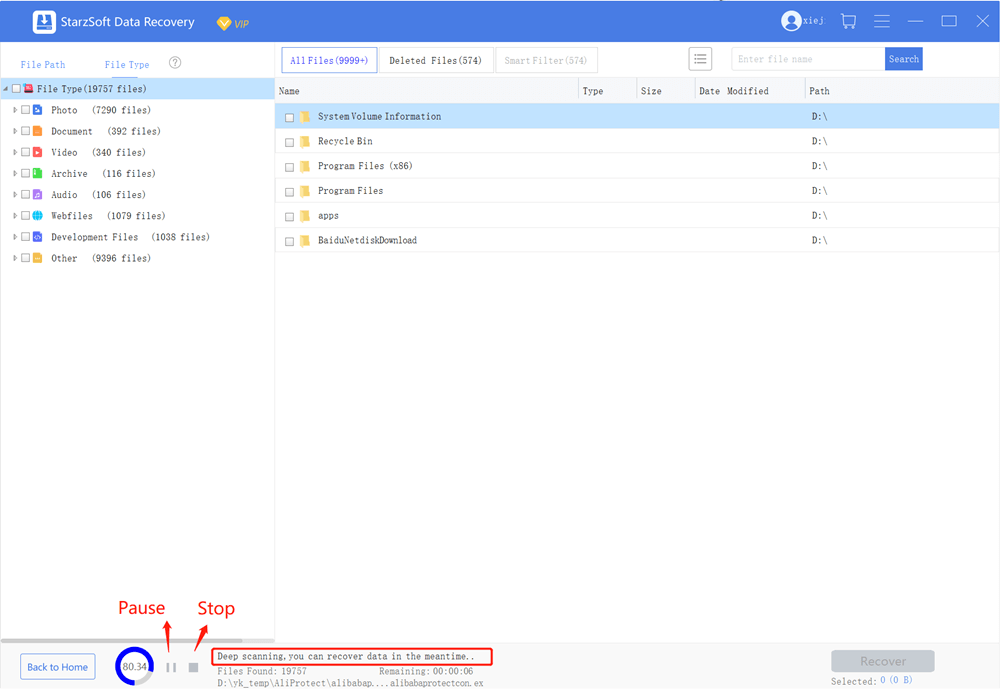
- 4.When the scanning process has been completed, you can use the filters to locate the lost/deleted files.
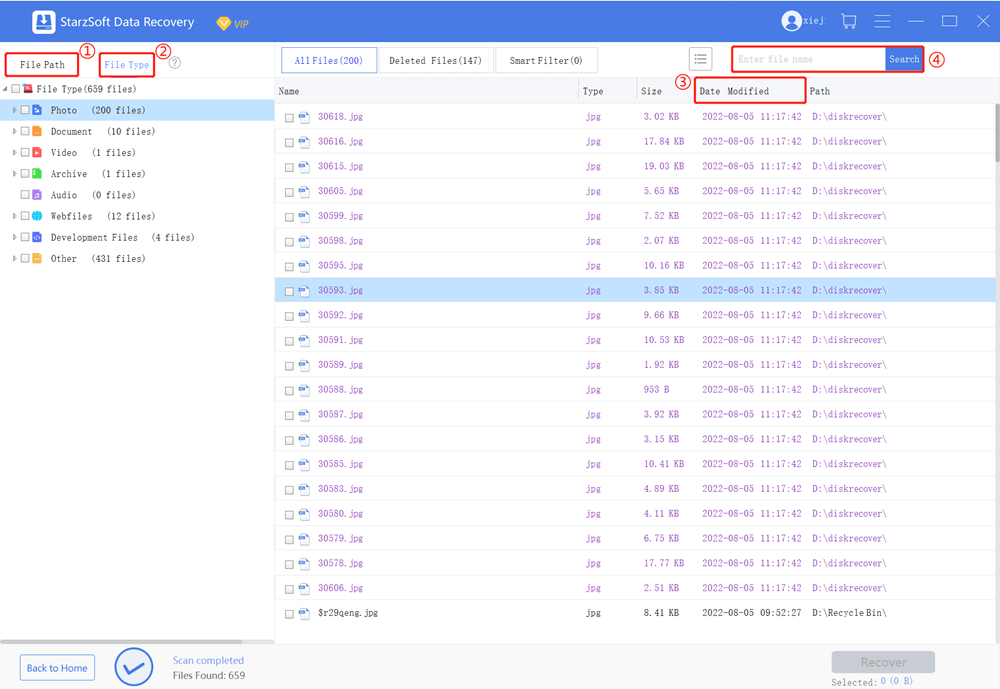
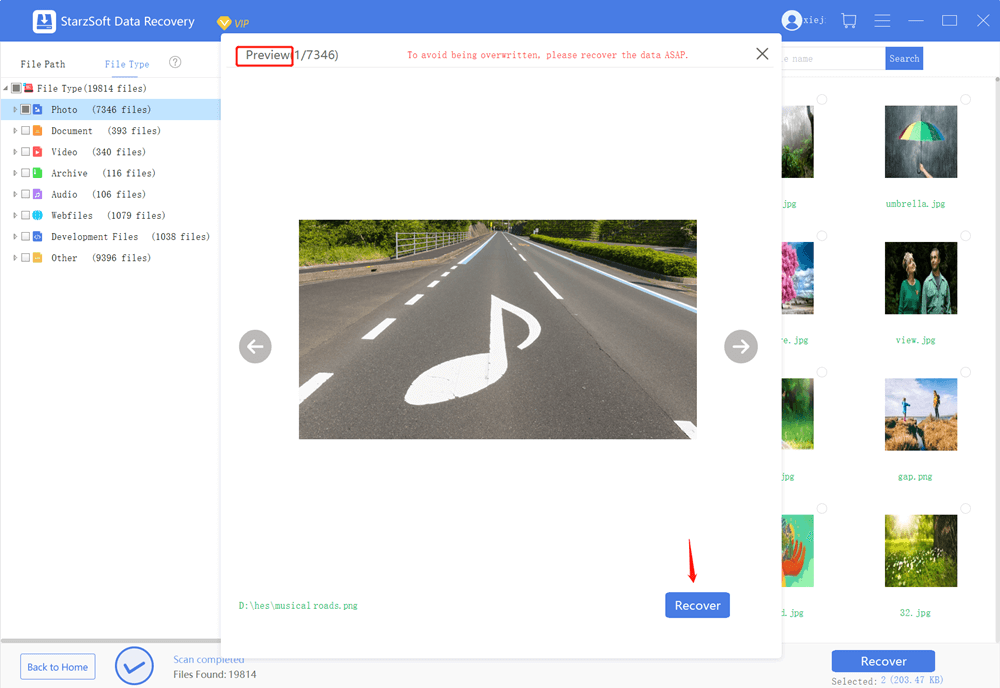
- 5.You can double-click the file to preview it. Once you have selected the recovery files, click the recovery button to save them to the desired directory.
Conclusion
As you can see, it’s quite easy to “find duplicate photos of Windows 10/11” using the methods mentioned above. Moreover, if you accidently deleted any files while deleting the duplicate photos, look no further than StarzSoft Data Recovery.
Free DownloadSecure Download
