USB drives are an excellent way of transporting data and files from one device to another. However, often times there are compatibility issues that may arise. In those cases, the best thing for one to do is to format the USB drive to the necessary format.
In most cases, this means that you will need to format USB to fat32. This is a relatively simple and easy process, and it can help ensure you will be able to transport the necessary documents between all of your devices.
Question: Why Need to Format USB to Fat32?
1. What’s Fat32?
FAT32 is the default file system used by most external drives. This is usually used for files that are below 4GB and it can only be used in USB drives and SD memory cards that range from 2GB to 32GB.
Therefore, an external hard drive will normally not be using FAT32. Usually, when you are using Windows tools, you are easily able to discern whether the drives you are using fall under the FAT32 category or not.
2. Why Need to Format USB to Fat32?
There are many different reasons why you might choose to format a drive.
Most commonly formatting a drive is a process completed when an individual wants to delete all of the information and data already held by the drive so that they can fill it up with new data. This is only one of the cases in which a driver will need to be formatted.
Usually, when one chooses to format USB to FAT32 it is also because they want to change the file storage system used for their external drive. This could be necessary due to the files that they are choosing to save on their drive.
How to Format USB to Fat32 on PC
There are a few different ways one can try to use to format USB to fat32. These include both methods that require you to use the regular Windows tools as well as methods that require third-party tools to format USB to FAT32. All of these methods can effectively work in formatting the drive.
What is important to note when you are selecting whether or not your will be formatting your USB, is that once the decision has been made it becomes extremely hard for one to restore the data that they used to hold in the drive.
If you want to format USB to FAT32 then you can try the following methods:
1. Windows File Explorer
Getting to format USB to Fat32 through the Windows File Explorer is the easiest possible way of actually formatting your drive. This is because there are no third-party tools necessary to complete the process.
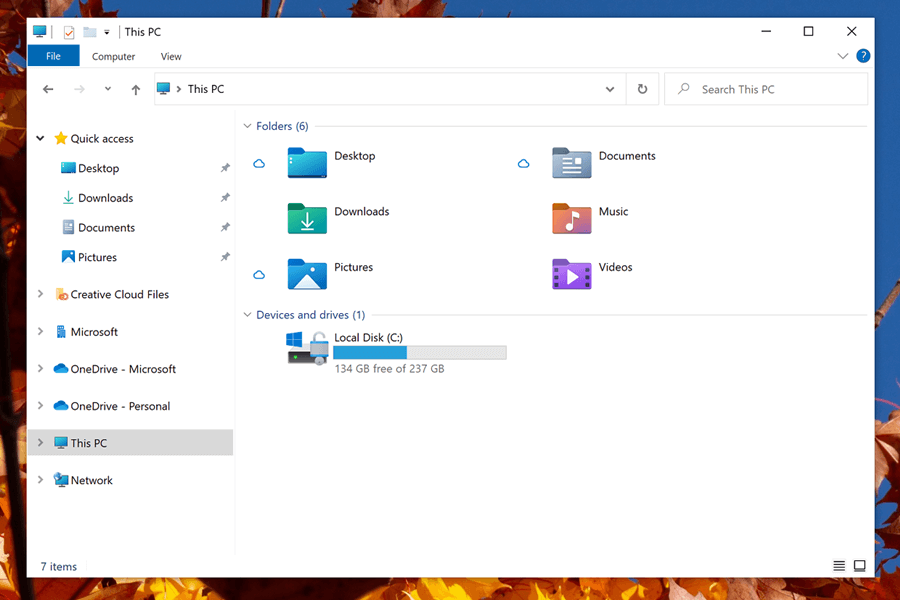
So long as you are working with a Windows 7 or above you should be able to easily use this method to format USB to Fat32. What’s more, this method is simple to use, which means you should be able to easily complete the steps without a problem.
Step 1. Connect your USB drive to your Windows PC, normally you can directly do that through the USB ports available.
Step 2. Either open a folder and search for the File Explorer or press the Windows +E keys which is the shortcut that will automatically open the File Explorer.
Step 3. Right, click on the USB drive, which will be assigned a letter, and press on Format.
Step 4. Change the target file system to FAT32, from there select Quick Format
Step 5. Press on Start
2. Rufus
If you are unsure about how to use the file explorer to format USB to fat 32 then what you can do is download third-party software that can easily complete the process for you.
The most reliable of these and the one that most people know about is called Rufus. Rufus is an easy-to-use program that you can easily download and then use to format other drives that you connect to your laptop. The process is fairly simple.
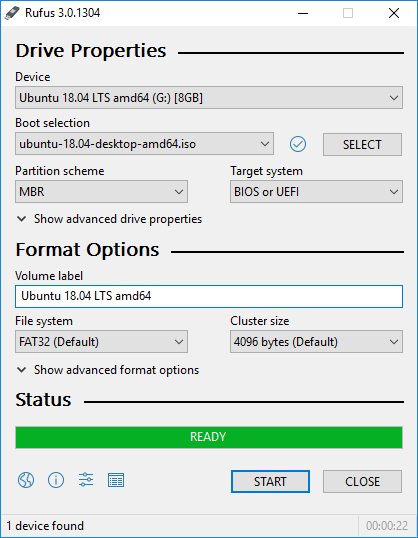
Step 1. Download Rufus from a reliable source
Step 2. Install the program once the download of the file has finished
Step 3. Open Rufus by clicking on the application shortcut or the .exe file
Step 4. Connect the USB drive to one of the ports if it is not connected already
Step 5. In the Rufus boot selection choose the option “Non bootable”
Step 6. From the available “File system” section choose the option FAT32
Step 7. Press on start
3. PowerShell
Finally, if you feel a bit more comfortable using some of the more specialized tools that Windows allows you access to you can use PowerShell, which was previously known as command prompt, to format USB to FAT32.
This is the most complicated way of doing it if you are not familiar with this tool.
Step 1. Find Windows PowerShell on your computer and right-click on it
Step 2. Select the option to “Run as Administrator”
Step 3. Once PowerShell has opened you will need to type or copy and paste the following line format /FS:FAT32 DRIVE_LETTER:
The DRIVE_LETTER should be replaced by the letter that your computer has assigned to the drive you are looking to format. The drive letter is something you should be able to see from the file explorer after you have connected your USB drive to your computer.
Step 4. Press enter and allow PowerShell to format USB to fat 32
This step might take some time and it will often take more time than some of the other methods on this list. However, as there are no further steps needed you can always leave the process running and come back to it once the drive is already formatted.
How to Format USB to Fat32 on Mac
If you aren’t a Windows user you are still able to format USB to FAT32 albeit the process might be slightly different. This is nothing to worry about as the process is still relatively simple.
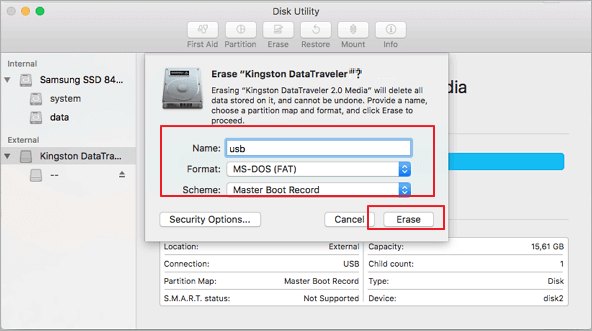
Step 1. Connect your USB drive to your MAC
Step 2. Open Applications
Step 3. Double Click on Utilities to open it
Step 4. Click on your Drive and press Erase
Step 5. Change the MS-DOS(FAT) format
Step 6. Change the Scheme to Master Boot Record
Step 7. Click on the Erase button to begin the process
How to Recover Unsaved/ Lost data after Formatting USB to Fat32 [HOT!]
To recover the data, you have lost after you formatted the USB to Fat32 you will need to use third-party software. This is necessary as normally that data would be completely lost and not able to be restored by the Windows tools provided.
One of the best tools for restoring data from a USB that has been formatted is to use Starzsoft data recovery. With this software, you will only need to follow a few simple steps to get your data back.
Step 1. Download Starzsoft data recovery from the official website
Step 2. Install the software to your computer
Step 3. Open Starzsoft data recovery
Step 4. Select the USB that you want to recover data from. For you to be able to complete this step you will need to connect the USB stick to your computer
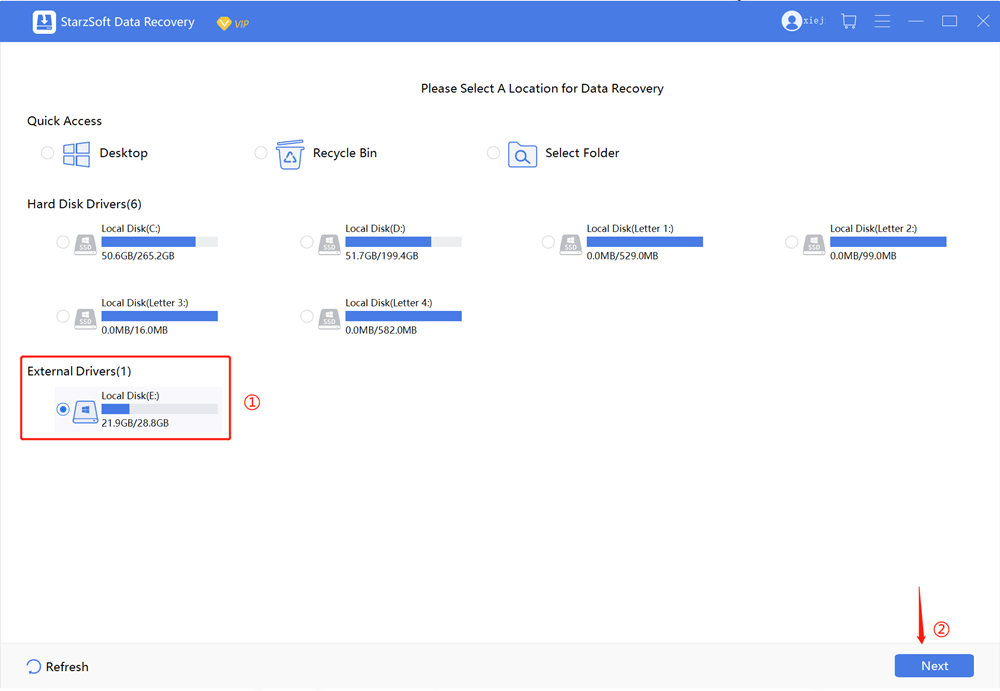
Step 5. Scan all of the data on the USB drive. This will filter through all of the data that you have stored in the drive that could be removed
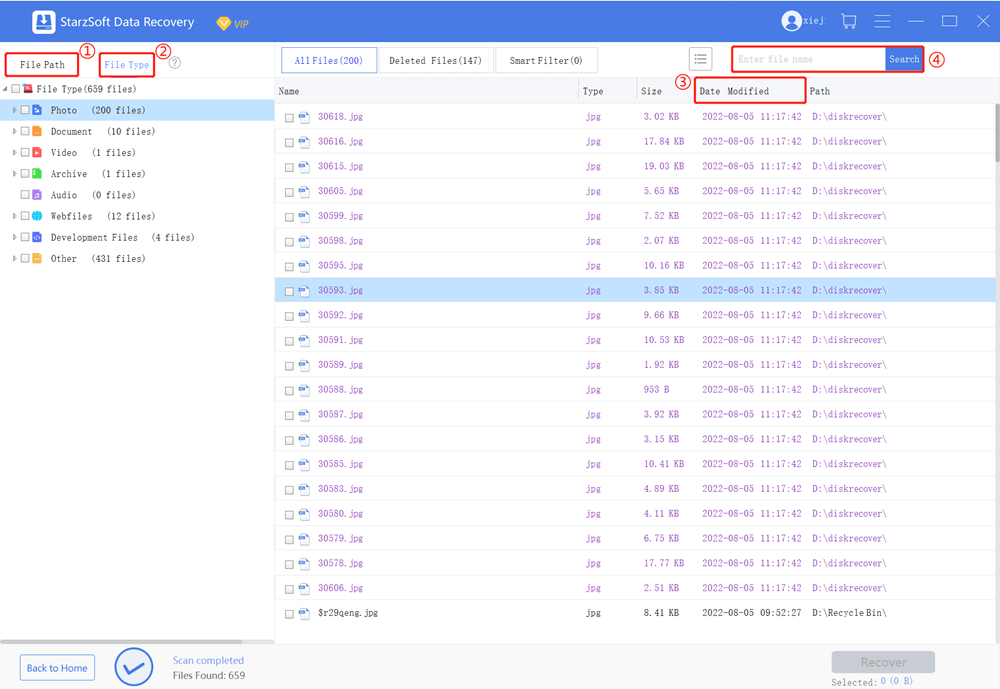
Step 6. Preview all of the files that the software has picked up as previously deleted and select which ones you would like to restore.

Here’s the detailed user guide of StarzSoft Data Recovery.
It is as simple as 6 steps that can make what was previously thought of as impossible, possible. When it comes to restoring data acting fast can often make a world of difference, so as soon as you realize that there is data you are missing start the process of recovery. This will increase the chances of you restoring your data.
Conclusion
When it comes to formatting as a USB drive to Fat 32 it is important to remember why you are doing it. In most cases, it is a necessary step that allows you to store all of the files and information that you need to move to your USB stick.
Depending on the files you are trying to store different protocols and systems may apply, which is why there will be times when you will need to format USB to fat32. On those occasions, you can always complete the process either by utilizing Windows tools or through using third-party software.
If you ever format data by accident then the best thing you can do is use Starzsoft data recovery as soon as possible to get all of your data back.
Free DownloadSecure Download
