Have you moved it from your network drive to your PC and are now receiving notifications telling you about “Windows photo viewer can’t display this picture, not enough memory” error? Your computer may also have plenty of capacity to display a few kb screenshot or image since even though it has 16GB or more of RAM, you will only be using about 2-3GB right now.
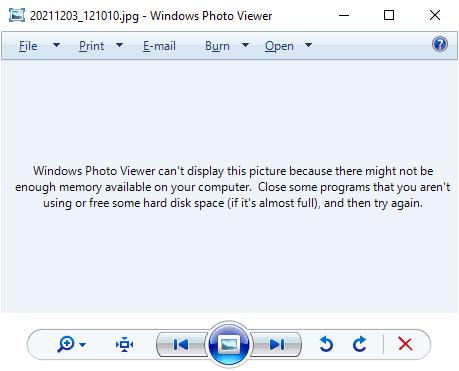
You may have tried using both “Windows Photo Viewer” and “Photographs” to open photos but were unable to do so. As a consequence, a message says that Windows Photo Viewer is unable to view this image due to memory constraints. This is not the first time that has occurred to you, is it? But you’re not left alone on how to fix the issue. There is no cause for fear. You’ve come to the right place. Here we have mentioned some solutions that will work for sure.
Why is Windows Photo Viewer Not Enough Memory Error Occurs?
Most of the time, the error is caused by something else rather than a memory space issue. Some of the reasons why the Windows photo viewer doesn’t have enough memory include the following:
- File corruption which simply means that the system file is not working properly.
- The photo format might not be supported by Windows Photo App.
- The app might not be current.
- The photo file is too large for it to be able to open.
- Working-place conflict which means there can be some problem in settings and you may see errors because of the actual memory issue.
How to Fix Windows Photo Viewer Can’t Display this Picture Not Enough Memor Issue?
1. Try to Recover the Picture If It is Removed
Data loss may occur while trying to open the photo and the memory error occurs. You may not be able to open various image files if you are continuously seeing “windows photo viewer can’t display this picture, not enough memory” error. However, the image files and any relevant data can be recovered using the StarzSoft Data Recovery Tool.
Even if you want to quickly fix the data recovery difficulties, the tool will be useful. Numerous social storage platforms presently enable StarzSoft Data Recovery, which has become even more specialised. It is an all-encompassing solution, even if your device routinely fails or has major issues that result in data loss issues of any type.
Free DownloadSecure Download
- 1.Before running the software, you should understand how to download and install it on your Windows PC.
- 2. Select Next if you want to scan your files right now. Only a disc, folder, or device must be selected.
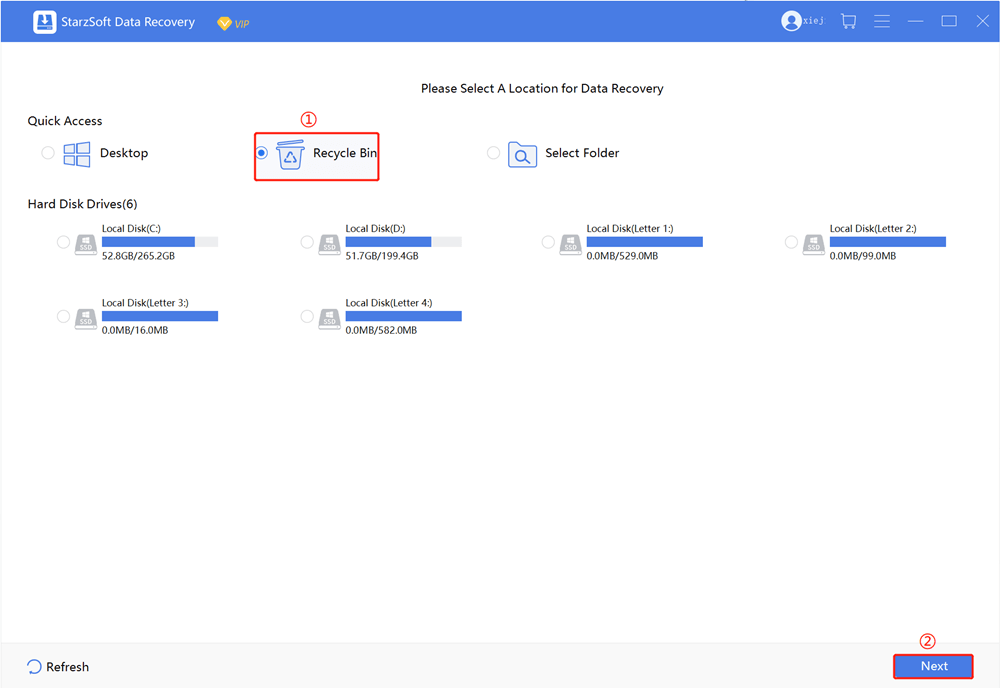
- 3. You will have access to all of the recovered data after the scan; to restore it, just choose the necessary data and click the Recover option.

It is claimed that all of the error’s causes can be resolved. The best part is that you may do it on your own. Now all you have to do to finish the modifications is adhere to the directions listed below.
2. Use Another Photo Viewer as a First Fix
The only file types that Windows Photo Viewer supports are JPEG, PNG, GIF, TIFF, BMP, DIB, and WDP. You’ll need to open the image file in a different programme if it is in a different format.
Several apps are also accessible to see different image formats, including Adobe Photoshop, Photo Retouch, IrfanView, Raw Image Viewer, and more.
- 1. Simply download and install any image viewer from the browser.
- 2. Run it.
- 3. Open the picture to see if it opens. It will.
3. Change to An Acceptable Format
If an image file format isn’t supported by Windows Photo Viewer, you can convert it to JPEG, TIFF, or PNG so that Windows Photo Viewer can see it.
The error “Windows Photo Viewer is unable to open this image” will be fixed. On the other hand, this method will reduce the size of huge, high-resolution images. However, at the very least, the programme now allows you to view them.
- 1. Open the Save as type drop-down menu by selecting File > Save As.
- 2. Then you may choose between JPEG, PNG, TIFF, GIF, HEIC, and a variety of bitmap formats.
- 3. The file will convert if you save it on your PC
4. Manage Your Colour Palette
In order to fix the issue where Windows Photo Viewer is unable to open this picture memory is insufficient, the restoration is like magic. It is anticipated that you would benefit from following it. The technique is described in detail below.
- 1. Here, you must first enter the “Settings” window. Therefore, simultaneously press and hold the Windows and “I” keys. .
- 2. After that, select “Display” from the menu on the left sidebar.
- 3. The best course of action would be for you to look at the right sidebar. Scrolling down will reveal the option for “Advanced display options.” Click this option.
- 4. After that, choose the drop-down menu’s entry for “Display adapter properties for Display.”
- 5. As a consequence, the “Properties” Window will appear. From the Window, select “Color Management” by clicking it.
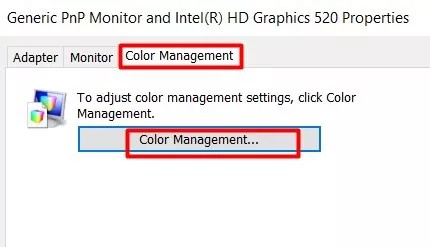
- 6. Hit ‘Identify monitors’ here to see the default monitor options. From the drop-down option, choose “Use my settings for this device.” .
- 7. Afterward, check the box next to “Profile associated with this device:” Click the “Remove” tab after selecting any of the options you see. Then click the “Profile” option in the “Color Management” box at the bottom.
- 8. There are numerous choices available when you choose “Profile.” From this option, choose “Reset my settings to the system defaults.”
- 9. Then click the “Advanced” option in the “Color Management” box’s upper left corner.
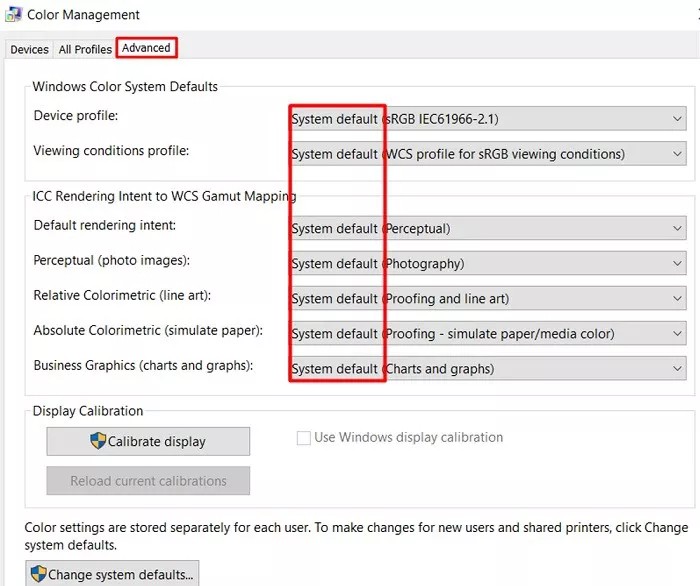
- 10. Restart your computer, then use Photos to access the image.
4. Run the Troubleshooter App
Try running the “Windows Store Apps troubleshooter” if the problem with the Windows picture viewer still won’t appear.
- 1. Use the Windows and “I” keys together. The “Settings” Window will appear on the screen.
- 2. Choose “Update & Security” from the drop-down menu as you scroll down.
- 3. Select the “Troubleshoot” option from the left sidebar.
- 4. Look at the sidebar on the right. Scroll down to the “Additional troubleshooters” option to acquire access.
- 5. Go to the “Additional troubleshooters” section. Tap it to troubleshoot.
- 6. Wait a little while for the process to complete. At the conclusion of the procedure, you will be given the results and recommendations for improvement.
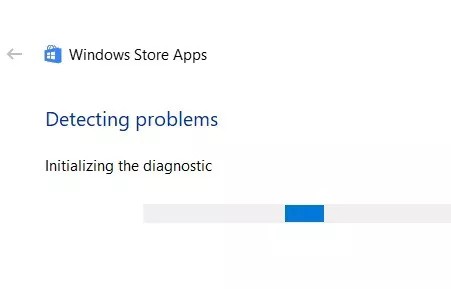
You must adhere to the directions displayed on the screen at all times.
5. Run the System File Check Scan
Run the SFC scan command as a quick fix for any system issue. The steps are described below.
- 1. Using the Windows key, enter “cmd.” Choose the “Run as administrator” option from the drop-down menu that will appear.
- 2. Then, copy and paste the next command into the “Command Prompt” Window as it appears.
The command is “sfc/ scannow.” - 3. Next, press the “enter” key.

You’ll then need to wait a little while for the process to finish. If an error is discovered, the command that is now running will check the system and automatically fix it.
FAQs of Windows Photo Viewer Cant Display This Picture Not Enough Memory
1. Why does my computer continually tell me there isn’t enough memory?
Your computer will display the message “Not Enough Memory to Complete This Operation” if the necessary memory is not available. Furthermore, a number of things, including missing, damaged, or incompatible device drivers, hardware failure, and others, might contribute to the Not Enough Memory issue in Windows 10.
2. How can I access images in Photos if I see an “not enough memory” issue ?
The built-in Windows troubleshooter for Photos and other Windows programmes should be used as the first point of call to resolve issues. To access other troubleshooters, go to “Settings -> Update & Security -> Troubleshoot.” To see if the issue is resolved, scroll down to Windows Store Apps and select “Run the troubleshooter.”
3. How can I fix the Windows photo application?
Click Start > Settings > Apps > Apps & features for users of Windows 11. Click on Microsoft Photos or Photos by scrolling down. Select Advanced settings by clicking the three dots. To try to repair the app without damaging your data, click Repair.
Conclusion
Windows Photo Viewer can’t open this picture is not a new error message. Due to the limited file format support, users regularly run across this problem. In this case, the issue can be resolved by converting the file format or by viewing the photographs in alternative photo viewers.
It is advantageous to constantly update both the software and Windows. The image is probably corrupt if none of these troubleshooting techniques resolve the issue. For this situation, StarzSoft Data Recovery is a great restoration tool.
Free DownloadSecure Download
