A new iOS update comes, and you try to update your iPhone, but a pop-up appears saying “attempting data recovery iPhone”.
Unfortunately, many iOS users have complained about this issue; let us assure you; it is as frustrating as it gets.
Many reasons could cause this unfortunate situation, but you shouldn’t be panicking as this post has everything to help you fix the issue you’re facing.
Part 1: Why is My iPhone Attempting Data Recovery
You’d have wondered why the “attempting data recovery iPhone” message pops up. A couple of crucial reasons cause this issue.
- The error message might appear when you try to downgrade iOS from 14 to 13.
- You may face the unwanted issue when you tend to disconnect iOS from your PC while updating your iPhone using iTunes.
- If you opt to update your iPhone after jailbreaking, you could face the issue you’re currently struggling with.
Part 2: How to Fix Attempting Data Recovery iPhone with 100% Work Way
If you don’t want to lose data when fixing the “attempting data recovery iPhone” issue, you can acquire the services ofStarzSoft Fixcon. It is a remarkable iOS problem-solving tool that can fix 150+ iOS issues with minimal effort.
The best talking point about this tool is its ability to restore your iPhone without causing data loss. You heard it right; you can repair iOS devices with no data loss, courtesy of the Standard Repair Mode.
On top of that, Fixcon has a straightforward user interface that smooths the repairing process.
- Fixcon offers a 100%success rate.
- It allows you to put the iPhone into recovery mode.
- You can restore your iPhone without data loss.
- It helps you get rid of 150+ iOS issues.
How to restore iOS Starzsoft Fixcon
- 1. First, you’ll need to look for the latest version of Starzsoft Fixcon. For this, you’ll need to visit the official website of Fixcon and get the Starzsoft Fixcon on your PC. Next, connect the iPhone to the PC to proceed ahead.
- 2. If you don’t like losing data when repairing an iOS device, you’ll need to enter into the main interface of Fixcon and then select Standard Repair Mode.
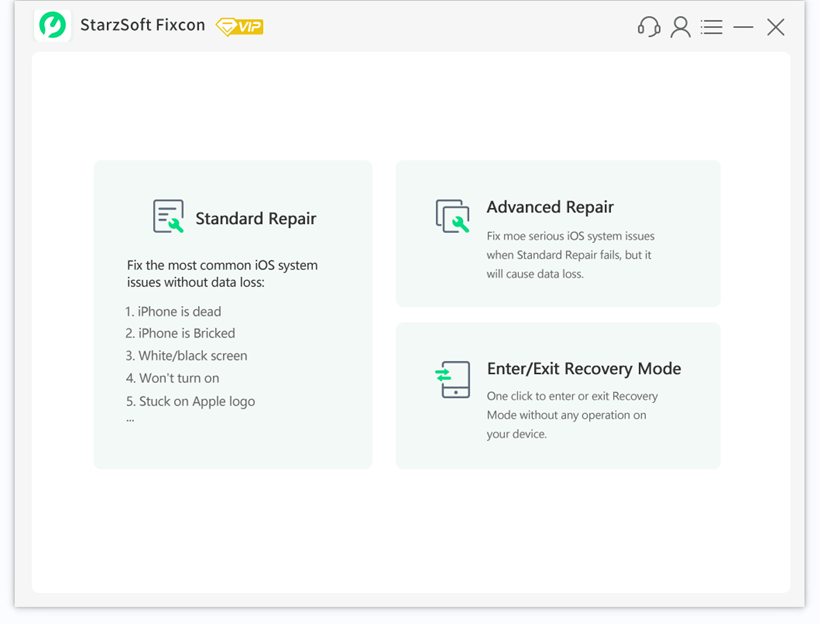
- 3. Now, you’ll need to ensure that information you’re downloading is about your iOS device. Once you’re sure about it, you must hit the “Download” icon to start downloading the firmware package.
- 4. In the last phase, all you need to do is select the “Continue” icon to start restoring your iPhone.
The process won’t take long, as you can restore your iOS device in a few minutes.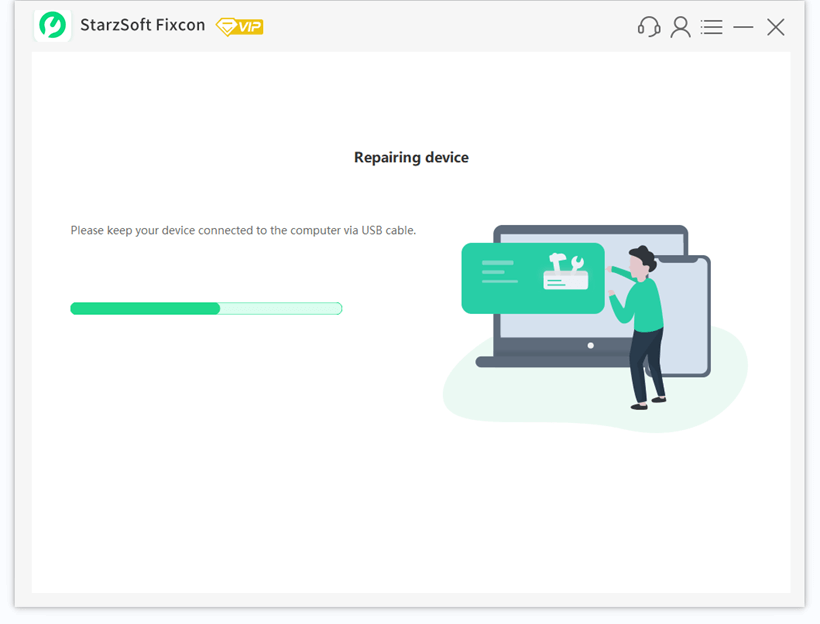
Part 3: How to Fix iPhone Attempting Data Recovery Use Recovery Mode
You can also fix the “iPhone stuck on attempting data recovery” issue by updating the iPhone in recovery mode through iTunes. But, you need to backup your data before taking this route, as this method will cause data loss.
Follow the step-by-step guide below to update your iPhone in recovery mode.
- 1. Connect your iOS device to your PC to begin the proceedings.
- 2. Force restart your iOS device but don’t release the buttons until you see “Connect to iTunes” appearing on your screen.
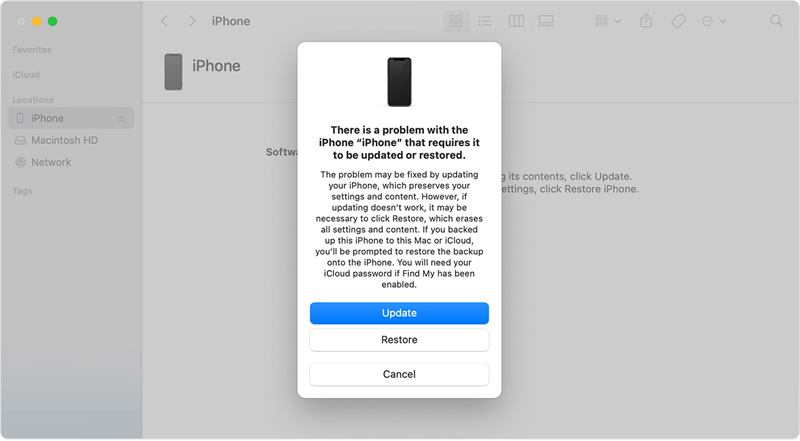
- 3. You’ll need to launch iTunes, and a pop-up message will appear saying the “Update or Restore” icon.
- 4. Next, you’ll need to hit the “Update” icon to install the iOS update again, and thankfully this process won’t cause data loss.
- 5. If updating the iOS device doesn’t work, you can select the “Restore” icon, which will cause data loss.
- 6. It takes a few moments before updating or restoring your iPhone.
Part 4: How to Fix Attempting Data Recovery iPhone with Two Simple Solutions (May Not Be Helpful)
1. Press the Home Button
If you’re having a “attempting data recovery iPhone” issue, you don’t need to panic at that moment. Instead, you can fix this issue by tapping the “Home” button and waiting for your iPhone update to complete. Once the update is completed, your iPhone might function normally.
2. Force Restart
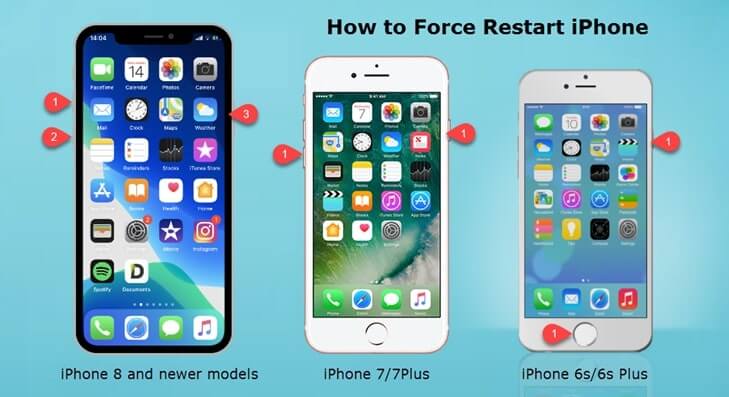
Hard resetting the iPhone might solve many problems, and you must consider force restarting the iPhone when facing the “iPhone attempting data recovery” issue. Here’s how to Force Restart your iPhone.
For iPhone 8 and Later
Press and release the volume up and down buttons. Next, you’ll need to press and hold the iPhone’s side button until the Apple logo feels its presence.
For iPhone 7/7 plus
Press and hold iPhone Sleep/Wake and Volume Down buttons until your Apple logo appears your way.
For iPhone 6 and earlier versions
Press and hold the iPhone’s Hoke and Sleep/Wake button until the Apple logo appears.
Part 5: How to Fix iPhone Attempting Data Recovery with DFU Mode (Data Loss)
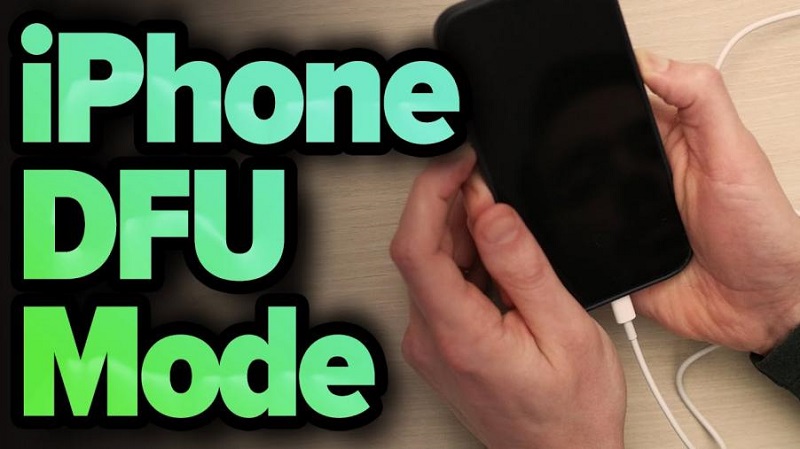
If nothing improves and you’re struggling with the same issue, you might try entering your iPhone into DFU mode.
Before entering your iPhone into DFU mode, you’ll need to ensure that the critical data is backed up properly, as this method would cause data loss. Here’s how to enter the iPhone in DFU mode if you’re using an iPhone with a Face ID.
- 1. Connect iOS device to PC after launching iTunes on your computer.
- 2. Press and hold the iPhone power and Volume Down button until 10 seconds. After 10 seconds, you’ll need to leave the power button but hold the volume down button icon for five more seconds.
- 3. You’ll need to release the volume down button when your screen turns black, which indicates that your iPhone has entered into DFU mode.
Part 6: How to Recover iPhone Data If It is Lost After a Fix
If you have lost data when trying to fix the “attempting data recovery iPhone” issue, you can read the following method to restore your data.
1. Use iTunes to Restore Backup
You can recover data from iTunes backup if you’ve backed up your data earlier. The steps of recovering your data are pretty simple, as you’ll only need to follow the guide below to get your job done.
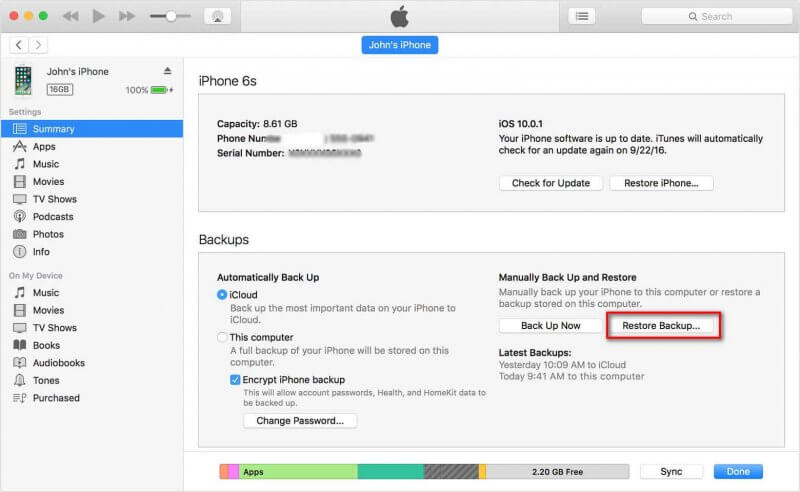
- 1. Launch iTunes on your PC and connect the iOS device to the computer you used to create the iTunes backup earlier.
- 2. You’ll need to tap the “Restore Backup” icon after hitting your device.
- 3. You’ll need to release the volume down button when your screen turns black, which indicates that your iPhone has entered into DFU mode.
2. Use iCloud to Restore Backup
Recovering iPhone data through iCloud backup is also pretty easy, as you’ll need to skim through simple steps to restore your data. Follow the step-by-step guide below to serve your purpose.
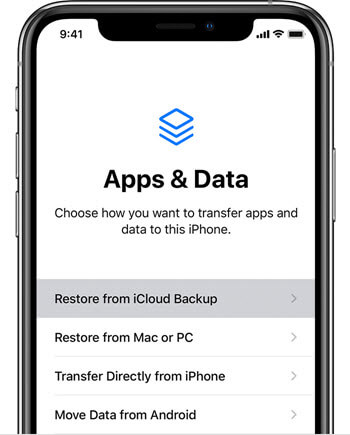
- 1. To begin with, you’ll need to navigate to the Apps & Data screen and select the “Restore from iCloud Backup” option.
- 2. You’ll need to enter your Apple ID credentials and select the backup you want to restore.
Conclusion
Getting an “attempting data recovery iPhone” message isn’t something you would’ve expected to deal with, but this guide reveals the most reliable ways to fix this issue.
After reading this post, you can explore different options to eliminate the unwanted situation. The possibility of eliminating your issue is immense with StarzSoft Fixcon. It comes with a 100% success rate and covers almost every software issue with minimal effort.
