“After updating my iOS device, I wanted to restore my data from iCloud, but an error arose displaying “verification failed Apple ID”. How to fix this issue”?
Many users have reported this issue, and there could be various reasons. However, the good news is that this issue isn’t something that can’t be settled, as you can get rid of this problem by reading this post.
Part 1: Why Does It Say Verification Failed on Apple ID
- You may receive a “verification failed in Apple ID” message for the following reasons.
- If your date and time are incorrect, you will face this issue.
- If Apple Server is down, encountering this issue is possible.
- WiFi network glitches, network settings inconsistency, and wrong Apple ID password can also be the main culprit of the issue.
- Missing verification code or an iOS glitch can also lead you to face the issue you’re struggling with.
Part 2: How to Fix Verification Failed Apple ID on iPhone
1. Set Date and Time to Automatically
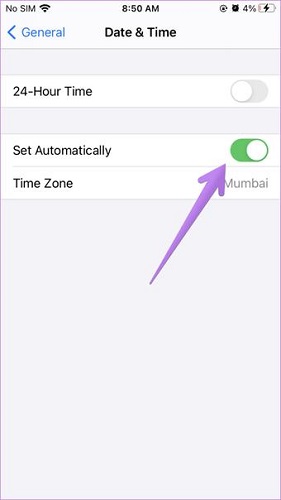
If you’re facing the “verification failed Apple ID” issue, you’ll need to ensure that the Date & Time is accurate.
Setting the Date & Time to automatically will help you update the date and time automatically whenever the iPhone gets started again. Here’s how to do it.
- 1. Navigate to Date & Time after launching iPhone Settings.
- 2. Toggle the “Set Automatically” option on.
2. Set Date and Time to 24-hour Time
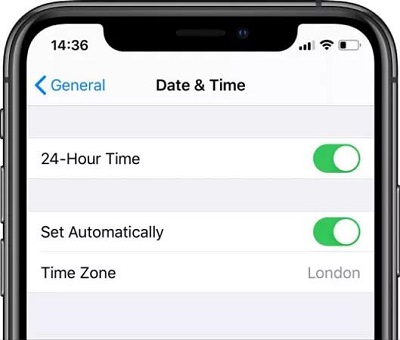
If you didn’t set your data and time to 24-hour time, you might face various iOS issues, and the “Apple ID verification fail” issue is one of them. Here’s how to set the Date and Time to 24 hours.
- 1. Navigate to iPhone settings and choose Date & Time.
- 2. Toggle the 24 Hour Time option on.
3. Enable Apps to Access WLAN & Cellular Data
If you haven’t turned on your WiFi or cellular network, you may face a “verification failed Apple ID” issue.
However, despite turning on WiFi and cellular network, if you’re having the same issue, you’ll need to ensure that you’ve endowed access to Apps for using cellular network and WiFi.
4. Sign out iTunes & App Store, Then Log in Again
Signing out of iTunes and App Store and then signing in again may assist you in getting rid of the “Apple ID verification problem”. Here’s how to do it.
- 1. Launch both App Store & iTunes after visiting the iPhone settings.
- 2. Click on your Apple ID from iTunes and select Sign Out.
- 3. Perform the same process with your Apple Store too.
- 4. After signing out from iTunes and App Store, you’ll be required to sign in with your Apple ID on iTunes and App Store again to see how it goes.
5. Try to Use a Hotspot to Fix Apple ID Verification Fail
If things don’t get better despite having used WiFi or cellular network, you might try using the Hotspot of your friends to check whether this helps you log in with your App ID without any issue.
Sometimes, doing so obliges you to fix the issue, but this doesn’t guarantee you take care of your issue.
6. Reset WiFi Connection If Verification Failed Apple ID
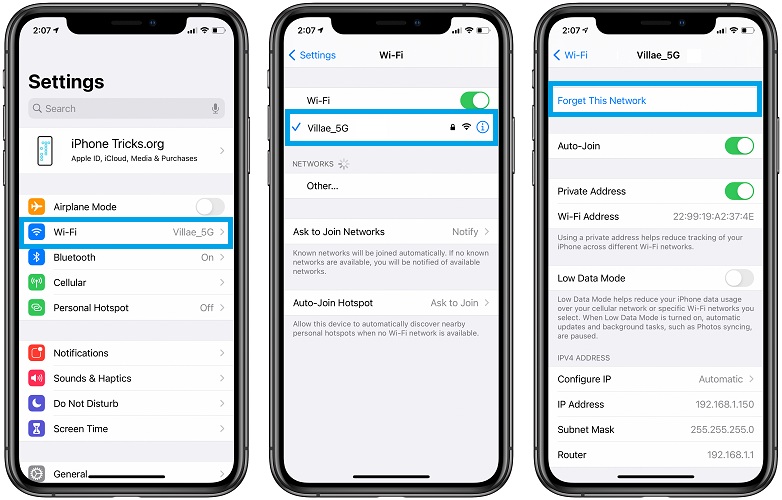
Another way to resolve the “verification failed Apple ID” issue is to reset your WiFi connection. Doing so might help you eliminate various problems you might be struggling with.
- 1. Open iPhone Settings and visit the “WiFi” icon.
- 2. Click on “Forget This Network” and this process will erase your WiFi password. Next, you’ll need to enter your WiFi password again to see how it goes.
7. Reset Network Settings When Apple ID Verification Failed
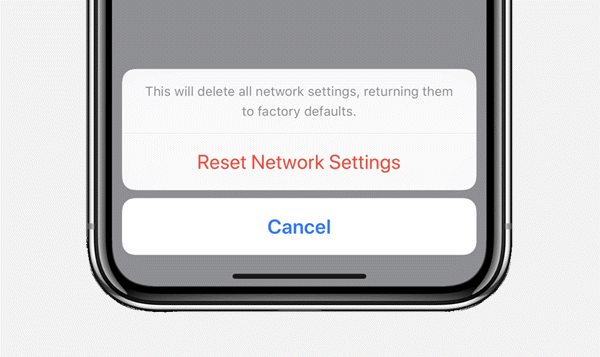
Resetting network settings might erase the settings related to your network, but it can help you eliminate the “verification failed Apple ID” issue.
- 1. Launch iPhone settings and navigate to the “Reset” option.
- 2. Select the “Reset Network” option and enter your password to confirm the action.
8. Change Your Apple ID Password to Try Again
Apple might have updated the password policy, which might end up preventing you from logging in with your Apple ID. Thus, you may deem changing your Apple ID password to fix this issue.
- 1. Launch iPhone settings and click on your name.
- 2. Select “Change Password” after hitting “Password & Security” option.
- 3. Type in your iPhone passcode and then select the new Apple ID password. Next, click on “Change” to finish the proceedings.
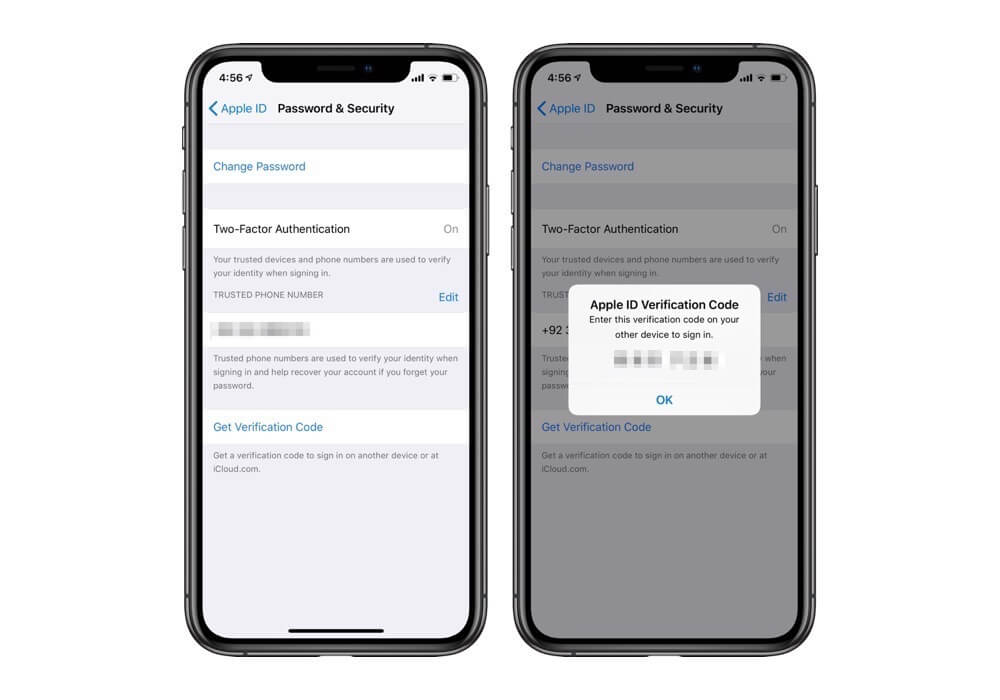
9. Try to Use the Verification Code
You may use a verification code to log in to your Apple on iCloud. Here’s how to do it.
- 1. Log in with your Apple ID on another iOS device and navigate to Settings. Next, tap on the iCloud option.
- 2. Tap on Password and Security before tapping on the ”Generate Verification Code” icon.
- 3. Type the verification code you’ve received into your iPhone; you’ve been facing an issue logging in with your Apple ID.
10. Reset All Settings and Then Sign Out the Apple ID
You also take care of “Apple Verification failed” by resetting your iPhone settings and signing out of your Apple ID.
To do it, you’ll need to visit iPhone settings and select the Reset option. Next, all you need to do is select Reset All Settings.
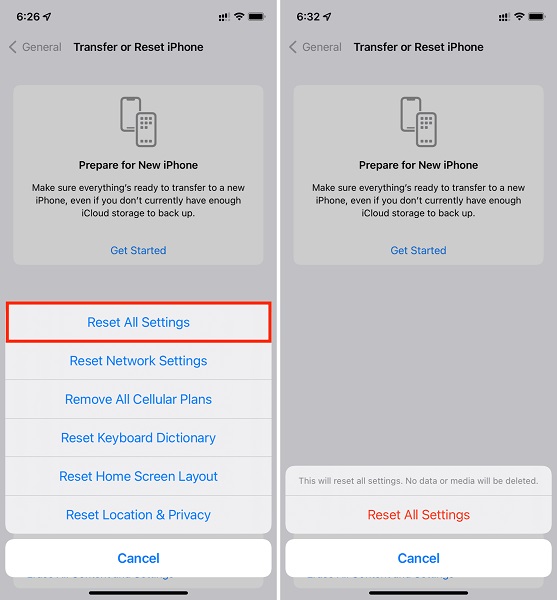
After doing so, check your profile and Signout from your Apple ID. Later, you can try logging in with your Apple ID to see how it goes.
Part 3: How to Fix Apple ID Verification Failed on Mac
Facing the “verification failed Apple ID” issue on your Mac is also pretty common, but you can fix this issue without having to do much. Follow the guide below to fix it.
- 1. Visit iCloud.com and select the “iCloud” icon.
- 2. Choose “Manage ID” and then sign in with your Apple ID on iCloud’s redirected page.
- 3. Scroll down to the “Devices” icon, select the device you’ve been facing issues with, and tap “Remove From account”.
- 4. Now, navigate to “System Preferences” and log in with your Apple ID again; the issue you’ve been facing will be taken care of.
Part 4: How to Fix Apple Verification Failed with Simple Clicks
The simplest way to resolve “verification failed Apple ID” is by using StarzSoft Fixcon. It is a breathtaking and prestigious tool that aims to eliminate 150+ iOS issues with ease. Fixcon won’t cause data loss because of the Standard Repair Mode.
How to repair an iOS device using Starzsoft Fixcon
- 1. Start Starzsoft Fixcon on your PC before linking your iOS device to your PC.
- 2. Look through the main interface of Starzsoft Fixcon and choose Standard Repair Mode.
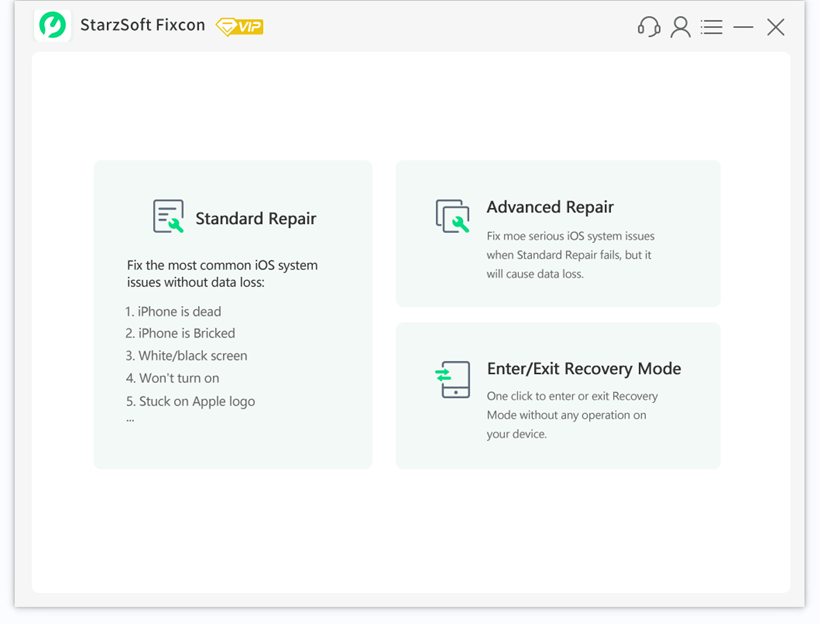
- 3. Grab the latest firmware package by tapping the “Download” option.
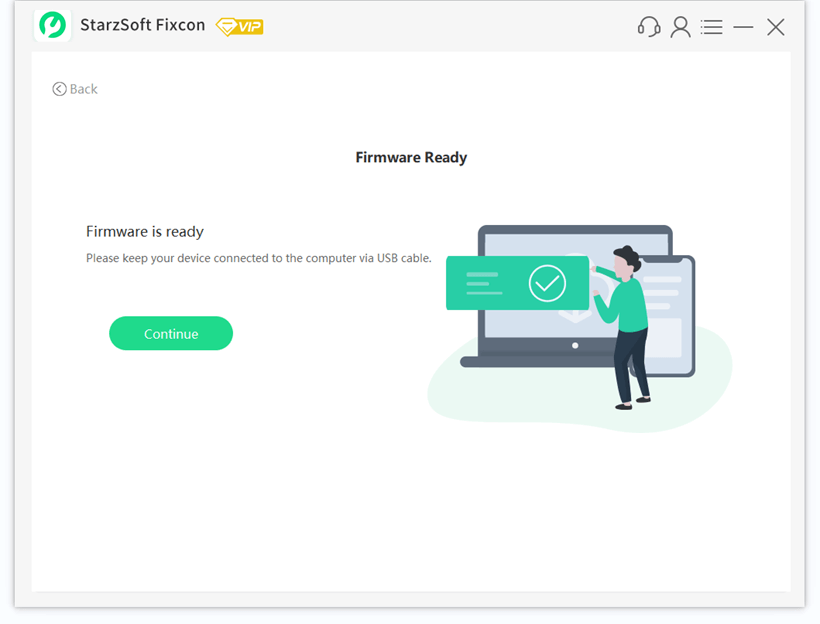
- 4. Start restoring the affected iOS device by pressing the “Continue” option.
Wrap It Up
This post has everything in it that empowers you to fix the “verification failed Apple ID” issue.
However, if the methods above don’t help you, opting for StarzSoft Fixcon is the only way around. It is an excellent third-party tool that stimulates fixing 150+ iOS issues.
