Are you facing the problem of iPhone error 54? Want to know if it’s the same as iTunes error 54? A permission problem on your PC or machine causes iPhone error 54.
Part 1: What Does It Mean When iPhone Error 54 Occurs
It commonly happens when you upgrade your iPhone, iPad, or iPod to a new operating system and try to sync it with iTunes. It can happen for a variety of reasons, as detailed below.
- The version of iTunes on your computer is not the most recent. To sync your iOS device with iTunes, you must upgrade iTunes to the most recent version.
- Due to a malware infection or a human error, iTunes-related application files were erased.
- Due to an iOS upgrade failure, iTunes files were corrupted.
- Virus/malware infestation or human mistake has damaged Windows system files.
- The iTunes programme was not correctly downloaded. It’s possible that the download was corrupted or that the installation was left unfinished.
Let’s see the working ways to fix the issue.
Part 2: How to Fix iPhone Error 54 with Common Solutions
1. Restart Both Computer and iOS Device
The Apple iPhone sync error 54 issue may be caused by blocked applications or programs, which may be resolved by rebooting the systems. As a result, restart both the iPhone and the computer to see whether this resolves the issue. Here’s how you can restart your iPhone.
- 1. Hold down either the volume or side buttons until the power-off slider displays.
- 2. Wait 30 seconds after dragging the slider for your smartphone to switch off.
- 3. To reactivate your smartphone, press and hold the side button (located on the right side of your iPhone) until the Apple logo appears.
Now let’s see how you can restart the computer.
- 1. In the taskbar’s lower left corner, click the Windows Start button.
- 2. A fly out will show when you click the power button icon, with options to Sleep, Shut off, or Restart.
- 3. By clicking on the desired action again, the computer will perform the action you’ve chosen.
2. Update iTunes and macOS to Fix iTunes Error 54
Here is another solution that works. You need to check for update of both iTunes and macOS.
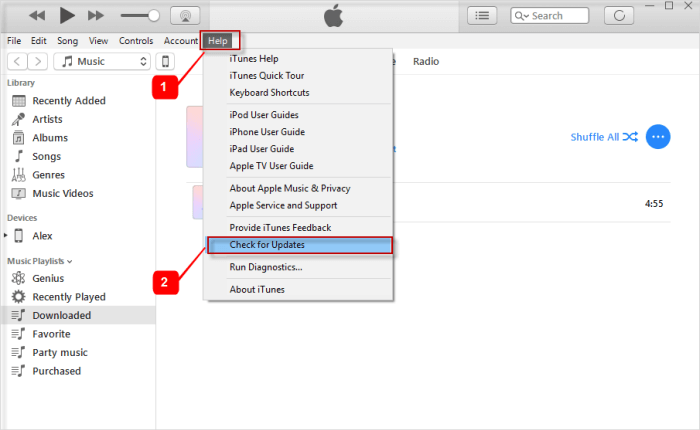
- 1. Launch iTunes on your desktop, then pick Help from the drop-down menu, then Check for Updates.
- 2. Option to Check for iTunes Updates on a Windows PC. For Mac, you can simply update it via the App Store.
- 3. Connect your iPhone to your computer or macOS after upgrading iTunes, and it should now sync with iTunes.
Next, let’s learn how to update Mac system.
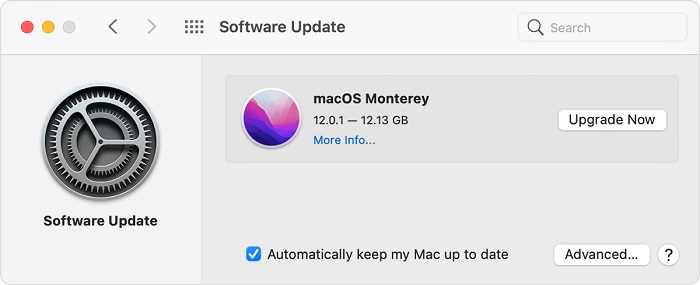
- 1. Find the Apple icon from your screen.
- 2. Select System Preferences.
- 3. From the pop-up windows, click on Software Update.
3. Consolidate the Media Files into One Library
Any files that were outside of your iTunes Media folder are copied and integrated to your iTunes Media folder when you consolidate.
- 1. Launch iTunes.
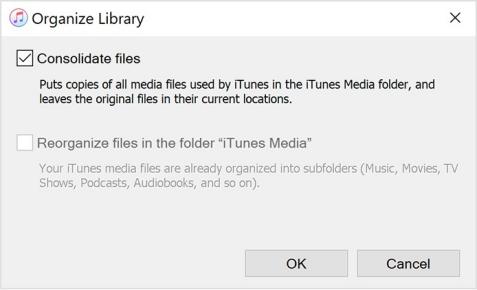
- 2. Choose File > Library > Organize Library from the menu bar at the top of your computer screen or the top of the iTunes window.
- 3. Choose Consolidate files from the drop-down menu.
- 4. Consolidate files are chosen on the Organize Library screen.
- 5. Click the OK button.
After you’ve verified that the copies are in your iTunes Media Folder, you may choose to remove the original files to free up space on your hard drive.
4. Try to Sync a Small Amount of Content
Only sync a minimal quantity of data at a time. Continue adding stuff until the issue appears again. You’ll be able to pinpoint the material that’s causing the problem this way.
5. Remove PDF Files from the Sync Process
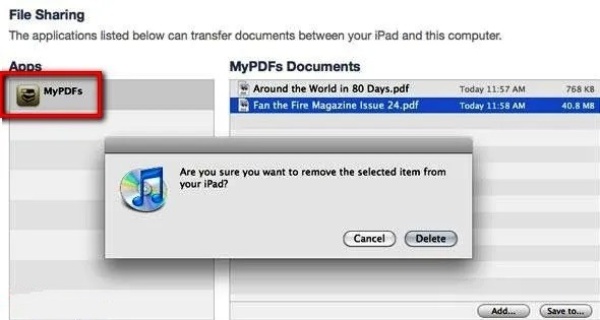
When you try to transfer iTunes app purchases or iTunes music transactions from your iOS or iPadOS device to your computer and see iPhone error 54, this problem may occur. Because Apple Books utilizes the same technique, this might potentially happen when you try to sync with it. If this is the case, there may be an issue with a PDF file saved to your iOS device’s Books app.
- 1. To repair the problem, send the PDF to yourself using the Share option in the Books app on your smartphone. This saves a copy of the PDF to your personal email and sends it to the online account you provide, which is accessible from your computer.
- 2. Delete the PDF file from your system after that.
Part 3: Special Solution for Windows Users to Fix iTunes Error 54 Cannot Sync
1. Un-check the “Read-only” Permission
To resolve problem code -54 on your Windows 10 computer, follow the instructions below (as it luckily did for us).
- 1. To open File Explorer on your pc, select the File Icon in the Taskbar.
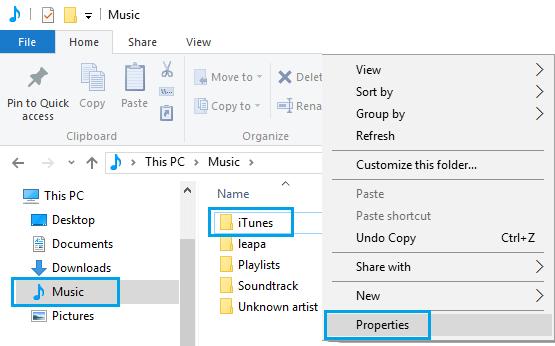
- 2. On the next screen, in the side-menu, select Music Folder. Right-click on iTunes Folder in the right-pane and look for Properties from the menu that opens.
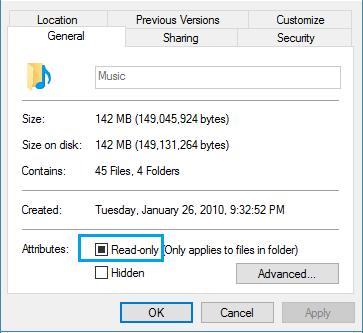
- 3. Uncheck the little box next to Read Only on the Properties screen (in Attributes section).
- 4. To save this setting on your computer, click OK.
- 5. Select Apply the change to this folder, subfolders, and files on the next pop-up and click OK.
2. Full Control Over the iTunes Folder
If it doesn’t work, keep in mind you maintain entire authority over the iTunes folder by following the instructions below.
- 1. Select the Music tab in the left-pane of File Explorer. Right-click on iTunes Folder in the right-pane and select Properties from the menu that opens.
- 2. Then choose the Security Tab on the iTunes Properties screen > click Edit and give your User Account Full Control.
- 3. Save this setting on your computer, click Apply and OK.
Note: In order to fully handle iTunes Folder, you will need to log in with an Admin Account.
3. Run iTunes as an Administrator to Solve Error 54 iTunes
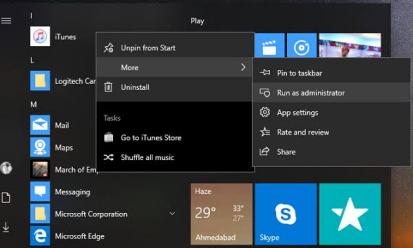
Certain operations in iTunes, such as installing software updates and making iTunes Store purchases, might result in iTunes error 54, which prompts you for administrator permission. Set iTunes to operate with higher privileges automatically to prevent these notifications.
- 1. As an administrator, log in to Windows. Click on Windows-X> File Explorer, you can also press the Windows-E.
- 2. Navigate to C:Program Files of iTunes on a 32-bit operating system or C:Program Files (x86) on a 64-bit operating system with iTunes.
- 3. Select “Properties” from the context menu when right-clicking “iTunes.exe.” Select the “Compatibility” tab from the drop-down menu.
- 4. “Run This Program as an Administrator” should be checked, and then “OK” should be clicked.
Part 4: What If There are iOS System Issues: Fix Now Easily!
If you’re experiencing troubles with your iPhone, including the iPhone error 54 issue, StarzSoft Fixcon is a powerful tool that can cure iOS/iPadOS/tvOS issues in a matter of seconds. It should be your one-stop shop for addressing issues like iPhone error 54 or iTunes error 54 fast and without losing data.
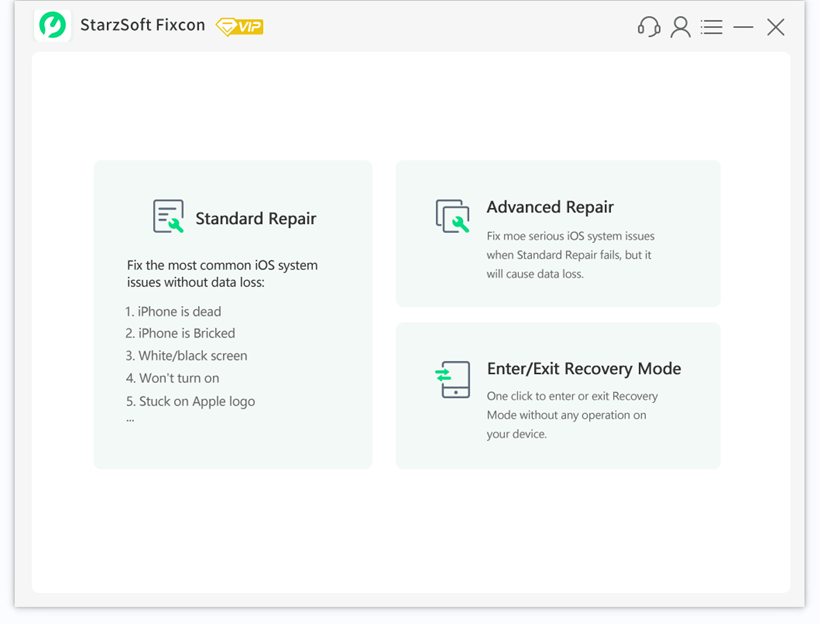
To fix iPhone error-54, you should utilise the Standard Repair option. The Standard Correct is advantageous and suggested for attempting to repair common system faults with minimal data loss.
- 1. Start StarzSoft Fixcon and go to the home screen, where you’ll see a variety of repair possibilities. Select “Standard Repair” from the drop-down menu.
- 3. Fixcon will recognise your device’s model type and provide the appropriate firmware packages. Choose your favorite and press the “Download” button.
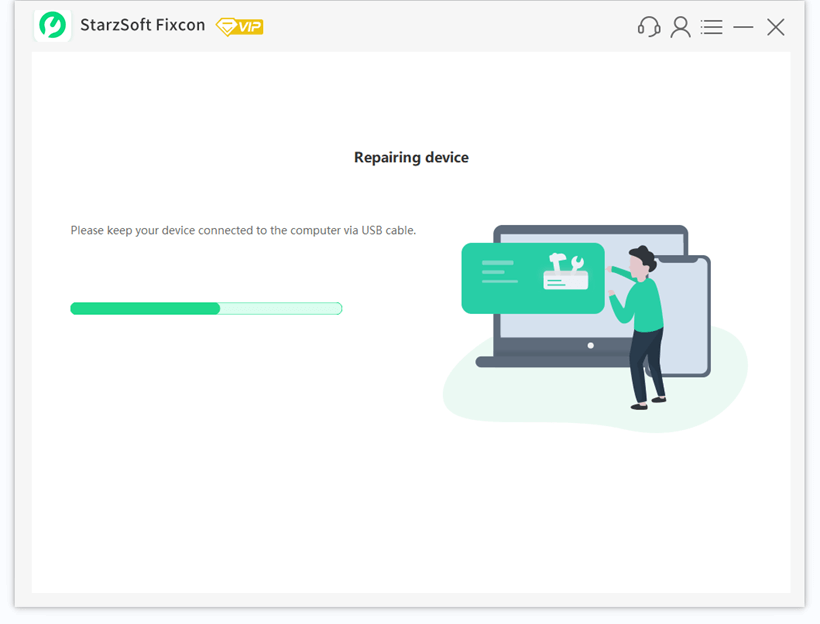
- 4. Click on “Continue” to start repairing, after the repair procedure is done, your device will be reset, and all of your data will be preserved. After that, you’ll see that the iPhone error 54 has been rectified.
Conclusion
Well, now you know how to solve the iPhone error-54 issue, it is time to implement the solution that seems most appropriate to you. You can also apply more than one solution to see which one works for you. If you want an instant and immediate solution, we recommend you proceed with StarzSoft Fixcon.
